If you are someone who likes to keep around things that are working correctly and perform well for you for as long as possible, instead of throwing them out every time the new best thing comes to the market, you came to the right place.
So, you have an old but loved AVR that served you well for decades. The reception is excellent, the sound is great, and all is set-up just to your liking. But, the time came to change the TV. You bought it, unpacked it, set it up, and realized that your new TV and your old receiver don’t speak the same language, so to say. There is not a single connector on your receiver that matches any of the ones that came on your new TV. What can you do? Should you throw away the receiver and spend hundreds of dollars to get a new one? Will it sound as good as the one you already have? Is there any way to keep the old receiver and yet, connect it to the new TV and play the sound? Of course, there is. Stick around, and you will find out how.
Page Contents
The problem of analog to digital and vice versa
For many decades, all audio devices, including your receiver, used analog connections to communicate with each other. However, modern technology, like your new TV, uses digital signals and connections to communicate to other devices, making them incompatible by default.
What kind of connections your old receiver supports?
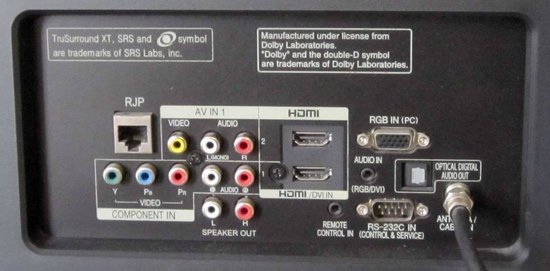
If your receiver is older than 15-20 years, chances are it uses only analog connections. Those connections are mainly RCA and AUX ports.

RCA stands for connector commonly used to carry an audio signal. It is short for Radio Corporation of America that designed and introduced this standard in the 1930s. Yes, you read it correctly. RCA is ninety years old and still kicking in many applications. It was initially designed to connect a turntable to the radio receiver back in the days. Since then, use has evolved to meet the needs of technology. It has two or three cables, depending on applications. RCA plugs and jacks are all marked in different colors. Red and white color are for audio signals and yellow for video.
Another type commonly present on old receivers is the AUX jack. It is short for Auxiliary, and it is still a ubiquitous communications port for audio signals. You will find it on most non-Apple smartphones, mp3 players, and other devices. It is a jack where you usually plug your headphones.
What kind of ports your new TV supports?
As you have probably noticed, the general trend in the 2020s is to go digital. So, your new TV will likely have few HDMI ports and TOSLINK ports.

HDMI stands for High-Definition Multimedia Interface. It is used to transmit uncompressed, high-quality audio and video data between compatible devices such as blue-ray disc reader and TV, for example. It allows the transfer of considerable amounts of data in high-speeds. HDMI came in 2003, and it has been improved a lot over the years, allowing more data, higher speeds, and some additional features such as CEC (Consumer Electronics Control). At this point, billions of different audio and video products use it as a standard for communication with other devices.
Another type of port you will commonly find in new TVs is TOSLINK. It is short for Toshiba LINK, and it is a standard optical fiber connection, mainly for audio signals. It was originally designed to connect different devices manufactured by the Toshiba company but became a world spread standard used by many other manufacturers to this day.
How to make an old receiver and a new TV talk to each other?
If you were reading carefully, you understand that analog signals and digital signals don’t mix. So, what do you do when two sides don’t understand each other? You bring in an interpreter to help them communicate. In this case, Converter to be a “middle man” between the receiver and the TV.

A Converter is a small, affordable device that uses a 5V power supply, usually by USB. As the name says, it converts an analog signal to digital or vice versa, allowing communication between otherwise incompatible devices and systems.
They come with many different options regarding connections. Usually, you will have RCA on one side and HDMI, TOSLINK, or both on the other.
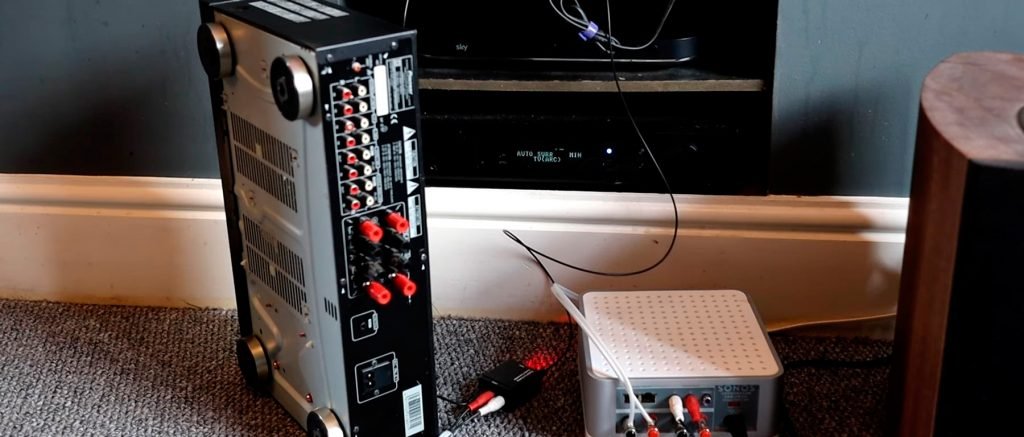
Let’s say you have the most common situation: HDMI on the TV and RCA on the receiver, and you want to play the sound from your TV through your sound system. You will need to buy HDMI to RCA audio converter. It will have an HDMI port on the input side and RCA ports on the output side.
You will also need an HDMI cable and RCA audio cable to make it work.
First, plug the HDMI cable into the HDMI OUT port on your TV, then plug the other end of that cable into the Converter. After you’ve finished with the digital side of the problem, go to the analog. Take the RCA cable and plug one end into the correct colored plugs on the Converter and the other end in available RCA INPUT on your receiver. When you did this, take the power supply cable, connect it to the power socket or the USB port on your TV and turn everything on. If you did everything correctly, you should hear your TV sound through your sound system.
In some cases, if the sound is distorted or you can’t hear it at all, you might need to go to your TV settings. Find the sound settings and choose stereo output instead of digital surround. This should fix the problem.
SUMMARY
Old Receivers, made before 2003, have analog connectors like RCA, while new TV sets usually support only digital like HDMI and TOSLINK. If you want to use the old receiver with the modern TV, you need to help them communicate. You can do this by purchasing and installing a digital to analog Converter to act as “middle man.” They are small, simple, inexpensive, and easy to install. You will also need an HDMI cable and RCA cable, so make sure you order them if they don’t come with the Converter.
Plug one end of the HDMI cable to the HDMI OUT on your TV, and the other end to the HDMI IN on the Converter.
Use the RCA on the other side and plug one end to the corresponding colors on the Converter and the other end to the available INPUT on the receiver.
Use provided power supply for electricity, or just plug the power cable into the TV’s USB port.
In some cases, you might need to go to the TV settings and find audio settings. Choose stereo out instead of Dolby digital or digital surround to make it work fine.
Enjoy!

