What is an Amazon Fire Stick?
The Amazon Fire Stick is among the best, if not THE best, TV streaming devices on the market today. It is small, and simple, yet packed with all the cool features you might need to stream your favorite video content.
Since the introduction of the first generation in 2014, up to the current 4k version from 2018, the Fire Stick featured up-to-date data transfer standards and voice control over Alexa and the microphone built into the remote controller.
It is inexpensive and allows you to stream thousands of channels if you have a decent internet connection and Wi-Fi. If you already bought it, you probably know all this, so let’s get to the point of making it work.
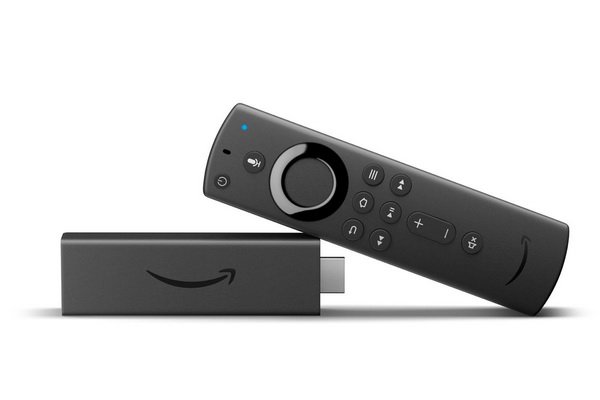
When you receive the package, it should contain an Amazon Fire Stick, extender cable, USB cable, power charger, remote controller, and a set of batteries. A brief instructions manual should also be included. If all is there, you are good to go.
How to connect it to your surround system?
Whether you got your Fire Stick from Amazon or some other source, you will not get much from the instructions manual. By default, it should be as simple as 1-2-3, but sometimes things can get tricky so let’s go through the three-step process of setting up an Amazon Fire Stick.
- Amazon says you need to plug your Fire Stick into the correct HDMI port on your TV and plug it into the power source (USB port or power outlet).
- Turn it on, then use the remote to go through the setup, enter the Wi-Fi password, and log in to your Amazon account.
And that should do it. Well, it might, and it might not.
Many people reported not being able to select the Wi-Fi network, set it up correctly, or not getting any sound after connecting the device.
And most of them connected it directly to the TV, not even trying to go through the AV receiver.
So, there must be some tips and tricks to this and how to do it properly, right? Well, yes, there are, and we will go through them.
An alternative solution to connect the Fire Stick and the Surround system
In case you, by some miracle, don’t care about the surround sound and don’t want to mess around with cables, correct audio settings, etc., there is another option, although it is inferior due to the lack of proper surround sound.
You can connect your 4K Amazon Fire Stick to your Surround or any other audio system. Yes, you might have guessed it – connect it via Bluetooth.
You can plug your newest generation stick that supports the latest Bluetooth generation into your TV and pair it up with your earphones, AVR, or soundbar. If they have Bluetooth, you are good to go.
However, please note that this will give you only a stereo signal, and we don’t recommend it.

Connecting the Amazon Fire Stick to the proper HDMI port
Before doing anything with the stick, make sure that you have connected your AV receiver to the TV using ARC-enabled HDMI out on your AV receiver and ARC HDMI input on your TV.
For this connection, use an HDMI cable rated for high speeds. For some of you who don’t know this, ARC stands for Audio Return Channel. This port allows two-way communication between your TV and your AV receiver.
Now that you connected your AV receiver and your TV, it is time to plug in your Fire Stick. There are two possible options, and you should choose depending on your Fire Stick version.
If you have a stick that supports 4K, plug it in the HDMI input on your AV receiver labeled HDCP 2.2. If you have any other model, use any HDMI input port.
If your stick is covering any adjacent HDMI ports when you plug it in, or you can’t get a good enough reception between the remote and the Fire Stick, use the provided extender cable. Then place the stick over or next to the AVR. By doing this, you should improve reception.
Why do you need a different port for 4K?
To be allowed to stream 4K resolution, your HDMI port has to support HDCP 2.2. This is a copy and content protection standard, specifically designed for use in the 4K applications.
If you don’t have an HDMI port that supports HDCP 2.2, you might not be able to watch the content at all. However, in most cases, you will be allowed to watch it in 1080p only. The same will happen if your TV doesn’t support 4K.

Why plug your Amazon Fire Stick into the AVR at all? Why not plug it in straight into the TV?
Some TVs may or may not pass your audio signal down to your AV receiver. If you plug your Fire Stick into the correct HDMI slot on your AVR, then you can be pretty sure that you will have audio.
When you connect your stick to the AVR, it is time to give it some power. You are provided with a USB cable and a charger. Depending on your available ports, you can use either of them. But, if you can get away with using one less power socket and plug it into a USB port, go for that option.
At last, put the batteries into the remote controller and pair it with your Amazon Fire Stick.
How to set it up to make sure you will always have the best possible sound?
First, you select the setup language. Then choose your Wi-Fi router/network and enter the password. This will allow your Fire Stick to connect to the internet and start downloading the latest updates.
Depending on the speed of your internet connection and how old, and long ago your stick has been manufactured, this downloading process can take some time. Therefore, don’t be alarmed if you see it still downloading and rebooting after 10-15 minutes. It’s all normal.
Upon downloading the latest updates, the setup will ask you to log in or open a new Amazon account.
When you log in to the Amazon account, the stick will register itself.
Once that is done, Fire Stick will take you through pairing up your remote with your TV and then through the tutorial and featured services you can choose from.
At this point, the setup will take you to the home screen, and you should be good to go.
Beware, there are a few settings that can make or break your Fire Stick experience, depending on whether you got them right or not.
First of all, go to your Fire Stick settings, find the Display and Sounds section, and then Audio and select Dolby Digital Plus automatic. This choice will allow your AVR to either get a Dolby Digital Plus or play stereo if Dolby Digital Plus is not supported.
Then, go to your AVR settings and set it up to process “Surround sound decode automatic” or a similar setting. Now your AVR will adjust to whatever it is receiving.
If you checked all the boxes by following these steps, you should be set and able to enjoy your TV, Fire Stick, and AVR’s full potential. Enjoy!