If you are not one of the few lucky ones able to afford the high-end car with top-quality audio installed, you might find your car sound a bit lacking. Most low and mid-range cars have coaxial speakers, compared to component speakers in high-end vehicles, and that difference can greatly affect your sound experience.
What is the difference?
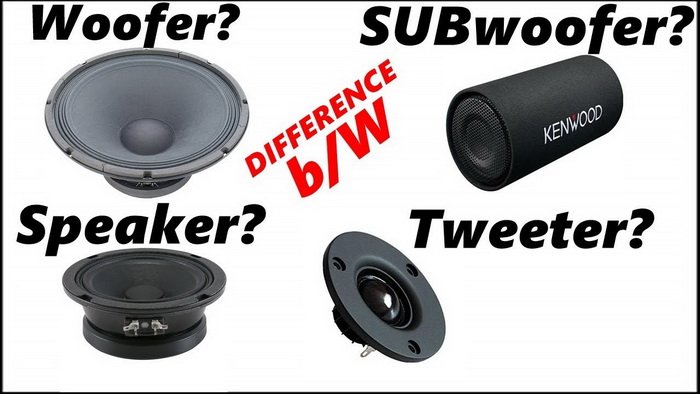
To put it in very simple words, coaxial speakers are an “all-in-one” package. Mid-range
Component speakers are separate, individual speakers, covering a specific frequency range. In other words, you get the sound from the three separate speakers compared to the coaxial one. This option requires a bit more investment and installation but offers a significant improvement in sound quality and overall intensity and impression.
What do you need to upgrade to component speakers?
You will need tweeters and woofers in sets of two, as well as two crossovers and you may or may not need wires and connectors to connect all that to your sound source. Depending on the situation, you might need some additional things like foam tape, zip ties, and custom brackets. Before buying, make sure that the RMS ratings of the speakers are close to the output of the receiver or the amplifier you plan to use.
This is not the only upgrade you can do. You can also get a subwoofer, additional amplifiers, and all kinds of additional sound makers until you get to the point where your ears will bleed but let’s focus on the basics. Let’s say that you just want to swap your coaxial car speakers with the component ones.
Option No 1. – Using existing wires
The first step in your installation is to remove old speakers.
To do that you will need to disassemble your door panels to reach them. Every car is a bit different so use your car manual and some experimentation to figure this part out. When you remove the panel and get to the

Now take your component woofer and check does it fill the hole in the door. If it does fit, it’ll save you some work. If it doesn’t fit, you will either need to enlarge the hole to fit the
Since you are not using a coaxial
Your tweeter can be mounted on the surface or flush. Flush mounting will require you to drill a proper hole in a suitable place and it’ll look more professional, while surface-mounting will spare you the drilling and fitting, but your tweeter will be visible and exposed. Either will work so decide based on how skilled are you in drilling and how much space you have. Just keep in mind these few rules:
Your tweeter should not be more than 12″ from your woofer. High and low frequencies travel at different speeds and separating them for more than 12″ could result in unsatisfying sound.
Unlike bass, high frequencies are very directional. Most tweeters you can buy will allow you to adjust them a bit directionally, but make sure you placed them somewhere where you can direct them towards the listener.
Recommended :
- Top 5 PA Systems for Cars & Trucks
- 15 Best Wireless Surround Sound Systems
- 10-Inch Shallow-Mount Subwoofers (Reviews 2021)
When you connected everything together, try it out and adjust the level of the tweeter if needed. You will usually have a way to set your tweeter level up to +/- 6 dB. Use that option if your high-frequency sound is a bit too loud or quiet. Now that you tested it all and it works fine, time to secure the crossover in place, as well as the speakers, and reassemble the door panel.
Follow the same steps on the other side of the car and you are good to go.
Option No 2. – Wiring everything from scratch
If you are wiring everything from the start, try to estimate how much wire you will need, and purchase 20% more than that. It is much better to spend a few extra bucks on the extra wire than to be frustrated and having to do the process if you end up being a few inches short.
You will find out that there is a room behind your receiver slot to run the wires and then you can secure them behind and under the dashboard until you reach the doors. Most doors have either holes made to run wires through them or protected, rubber boots that connect them to the body. Use any of those two but if you have only unprotected holes, make sure you install your wires in a way that doesn’t obstruct or restrict the use of any door functions.
All other steps stay the same. First, connect the crossover to the receiver, then the speakers to the crossover. Test everything before fixing all components and reassembling the doors.
A few common issues with the installation of the component speakers:
Speakers are out of phase
If the bass on one side is louder than the other, and it’s not due to the receiver settings, you may have reversed the polarity on your
Damage from the elements
Your
Buzzing speakers
If you are experiencing a buzz from the speakers, make sure you connected all the wires properly and that your speakers are not loose and vibrating in their positions. If you checked and cleared all these possibilities, you might have blown your driver by accident.
Distorted sound
If the sound coming from your speakers is distorted, that means that your receiver or amplifier is putting out more power than your speakers can handle. If turning down the volume doesn’t fix the problem, you’ll need stronger speakers that can take more power from the source.
SUMMARY
If you want to swap your coaxial speakers and get the component ones, make sure you get the ones with a proper RMS rating for your receiver or the amplifier. In most cases, you can use existing wires. Remove the door panels and disconnect existing speakers from the wire harness. Then attach crossover in their place.

You will connect your new speakers to the crossover.
Make sure that the hole is a good fit for the new woofer. If not, use a bracket or enlarge the hole to make it fit.
Place the tweeter within 12″ from the woofer and direct it towards the listener.
Test the sound. If all works fine, secure the components into their places and isolate and protect them from the elements.
Reassemble the door panels and enjoy.